Once upon a time, there was a boy who dreamed of building his very own treehouse. It was going to be big, with a hidden door, epic deck, and mini-fridge filled to the max with Mountain Dew Live Wire. This old repressed memory surfaced one night as I sat around trying to figure out how to spend my immense blogger wealth.
Looking out over my immaculate grounds, I realized two things. I needed a treehouse fort and I don’t have a tree. But it's fine, money fixes anything.
Naturally, the most overkill option was an engineer, they solve impossible problems all the time. After only one day they had an eloquent solution for how to build a treehouse without a tree... Make a house on a platform and plant a tree next to it. Boom, I paid him and broke ground the next day.
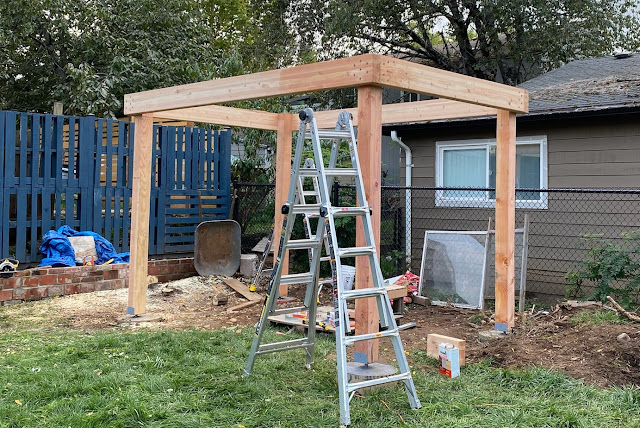
Building a treehouse is unfortunately not as easy as becoming a wealthy blogger, but to fulfill my dream I had to do it myself. I quickly came to see the limits of my building knowledge. So with 4ft holes in the ground, I took a pause and watched 3 to 4 minutes of YouTube videos to double-check my work. Thanks to all those people out there DIYing their foundation pours and structural framing, I was ready to take my life into my hands with 84 bags of concrete and a few $64 post brackets.
Now Portland is a great city, they keep you safe by making you pull a permit for EVERYTHING you do like moving dirt or swapping out your dishwasher. But if you call your ADU a "kid's play structure", you can build up to 200 sq ft & 20 ft off the ground - no permits needed. I know because I talked to several people in the permit office to double-check. As soon as I said "kid's treehouse", all talk of permits stopped and I was told to "have fun". Good thing building a treehouse is not as dangerous as installing your own dishwasher. Time to get some custom beams.
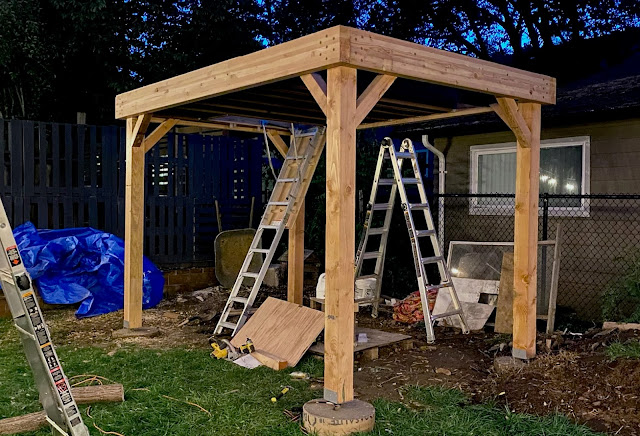
After the frame was up and the platform was a snap. Now, building is an art. You have to just start and see where it takes you. As I was putting the final touches on the floor, I decided I had to keep the trap door entrance dream alive. I just had no clue how that was going to work. Oh well, that a tomorrow's problem, and I was sure Youtube had the solution.
After a few weeks, I had it - an attic ladder. That was easy and in less than a week I had almost fallen to my death from this finished platform 10ft off the ground. I ended up preventing my fall by catching my shin on the edge of the attic ladder. Limping along I didn't even feel like I had cheated death and permanent dismemberment, I mean it wasn't an unpermitted dishwasher install gone wrong.
So the first of several unforeseen challenges now presented itself, building walls on the ground - easy, building walls 10 ft off the ground - less easy. Unphased by the fear of being pulled over the edge by a wall, I assembled and placed 3 of them. After running out of space on my platform, I made the 4th wall on the ground and just lifted it into place (with help). And I didn't break it.
It was at this point winter reared its rainy head. building in the rain sucks, if you can avoid it I 10/10 recommend you do so. To not make enemies with my neighbors, I didn't pay to make the rain go away. I was going to work in the rain like the common man. Or so I thought. After less than 30 min, I gave up and decided to let it be till the dry part of winter came. I don't know how people without blogger wealth live. Thanks to global warming, I didn't have to wait long for things to dry out.
Now, this is just a basic kid tree fort, so I'm going straight for wrap and sheet siding, no exotic sheeting or anything. Again building on the ground - awesome. Building 10ft up - not awesome. I made life hard already so it was time to pay to make it easy. Insert scaffolding. This fascinating invention saved my butt. For just pennies an hour, I was standing on top of the world and my treehouse. At 19.75ft to the peak of the roof, it's defiantly not low to the ground. Big brother not looking, I stacked them 3 sections high and jumped on the roof without harness or rope (or sanity apparently).
At this point the kid's tree fort/clubhouse would, for most people, be done; floor, walls, and roof, holes for looking out... what more do want kid?
Well, money doesn't spend itself, so we have to add some glass to those empty holes. A picture window and french doors that open to the balcony will do nicely. Now we're cooking with gas. They didn't have any outswing doors (dang it COVID) so a few minutes on youtube and I modified the inswing ones I could find in town. I'm my kids are going to love it. So more scaffolding and boom.
Almost...
My the kid's tree fort /clubhouse /hangs space still needs more. Money that is, I haven't broken $5k, I mean at this point am I even trying to say I love you? Time to secure the balcony. It's got to be OG Trex decking and the matching metal railing. It's a great pairing, like steak and red wine. Unfortunately even with 42in high rails (safety first, money no object) it, still didn't cost enough... Dang, it.
Well, spring is in full sprung so I'll have to let it be for now.
After several wet rainy weeks (where nothing leaked not even the doors I installed backward because I wanted outswing, cuz I'm the best). It was finally dry enough to paint. I asked the home depot guy for "something I won't have to repaint this decade" he sold me this paint that was $78/gal so it must be good. And wouldn't you know it, the treehouse is still 10ft off the ground. This time I am fearless. I would have paid for a scaffold, but painting was a 1-hour job. I didn't want to spend 30min per side setting and leveling scaffolding to paint for 15min. So, only 1,029 trips up and down my Gorilla Ladder and a few over-extensions while holding a brush in my left hand and the roof in my right... I had a glorious coat of paint on my little clubhouse.
It was also time to turn this basic clubhouse into a tree house, with a tree. We bought the best tallest tree the closest greenhouse had. More digging in the ground...
Sitting on the deck watching the sunset I felt almost at peace. I built the most epic tree house/clubhouse/hang space/inlaw apartment/ADU in the neighborhood (I know because I can see all the houses for 10 blocks around now and none of them have tree houses). But while the outside looked sick, the hidden trap door ladder impressed all my friends, and the balcony had views for miles - it still lacked something. Duh, I hadn't spent enough money.
Well you know what they say, it's what on the inside that counts. And the most over-the-top thing I could think of for inside (besides a 220v sub panel, AC, WiFi, and hidden floor safe), was hardwood floors!
I mean hardwood in your kid's clubhouse? How do you say "I can waste money because I'm blogger wealthy" without saying "I can waste money because I'm blogger wealthy". Now, the first choice is clearly solid cherry hardwood flooring, but reason and supply shortages prevailed and I went with a snap-in laminate. A nice touch still if I do say so myself.
Well here we are, I know what you're thinking, the inside is not done! Well, tough kids, it's a tree house it's not going to be bougie, you are here to play.
Well, it has been quite the journey. This little side project took just 9 months of spare time and enough money to buy a small island. The only things left are to pick some furniture, an area rug, and get a mini-fridge and I'm my kids are going to have a great time in here this summer. Now, time to chill on the deck with a nice cold cider - story of my life.


